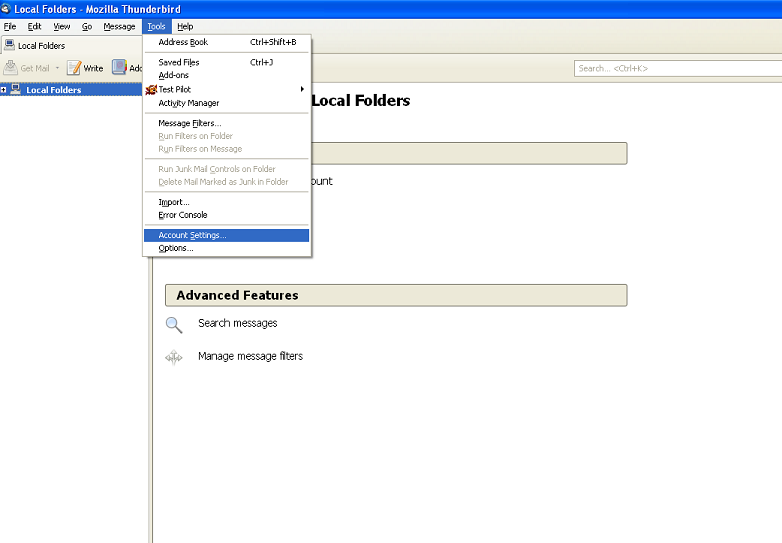
Open Mozilla Thunderbird. If the option to start setting up an account does not appear automatically then click "Tools" and then "Account Settings."
|
|
|
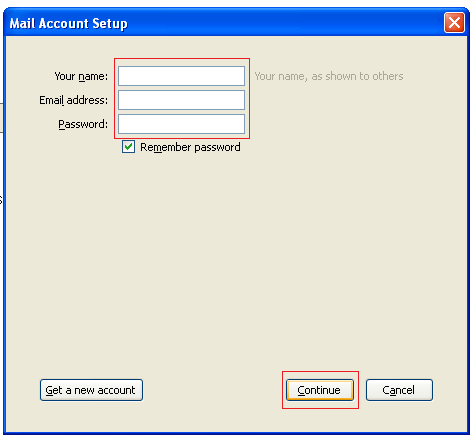
Please enter your name and email address to obtain your mail settings:
Setup A New Account - Mozilla Thunderbird 13.0.1
|
|
|
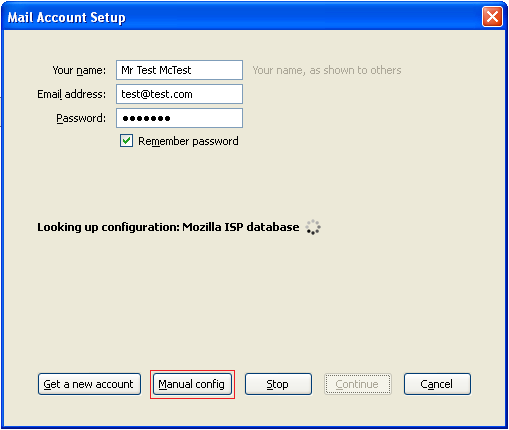
This is the initial screen and is actually being used to scan various common server configurations to skip manually setting up your account. We aren't planning to skip manual set up but still enter the your name, your email address and password here. The "your name" part will be what is displayed on outgoing messages as the sender Once you've entered everything hit Continue |
|
It will begin to scan common servers at this point. You can cancel this process by clicking "Manual Config" So do that now. |

|
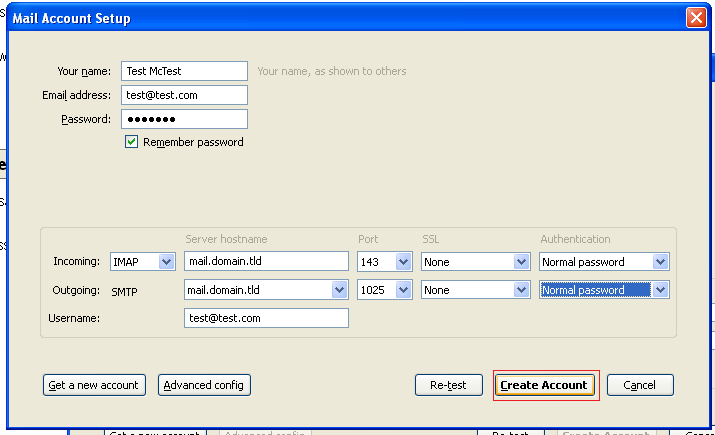
This is the screen we really want to see. On here we would enter our: 'Incoming Server': Replace with: mail.your_website_address.comAnd our: 'Outgoing Server': Replace with: mail.your_website_address.comSet the incoming port to 143 for IMAP or 110 for POP for incoming and the outgoing port to 1025. Set the SSL's to "None" and the authentication to "normal password" and, of course, set your username to your email address. |
|
The finished product should look like this. Hit "Create Account" at this point. |

|
You will see this message informing you that you have no SSL options enabled. This error just reminds you that if you transmit a lot of secure data like credit cards and personal information you will want to look into getting SSL on your email. For the moment make sure "I understand the risks" is checked off and then hit "Create Account" and you're done. |
© 2026